Learn some basic steps for making a 3D model of a sheet metal part in CAD, and then quoting it with OSH Cut.

Video Transcript:
Alright, let’s walk through the basic steps required to make a 3D model of a sheet model part in CAD and then quote it and order it inside OSH Cut’s automated system.
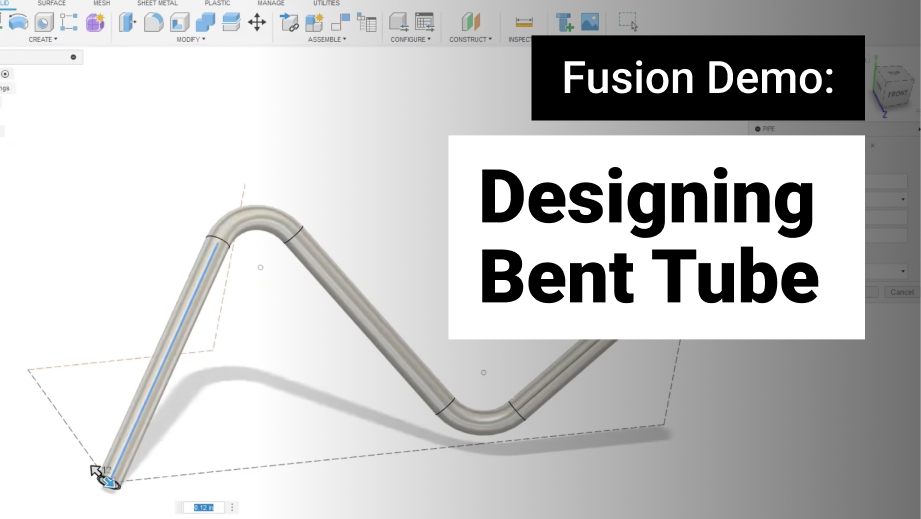
Alright, so I'm using Fusion 360. We recommend Fusion 360 because number 1, there’s a free version, and number 2, even if you do the paid version it’s really cheap especially compared to some of the other industry standards like Solidworks. So, we’re using Fusion 360. I have a new drawing set up here. So the first thing we’ll do is create a sketch. So up in the top left there’s a create sketch button. I’ll click that, and then I’ll click the plan that I want to add that sketch to. So, I’ll just do it here. I want to draw a rectangle. You can do that by clicking here and you’ll do a 2 point rectangle like this. Or, I’ll do ctrl Z undo that, you can just hit R and it’s a short cut for that. Now rather than just using the mouse, I can actually tab between dimensions here and set them manually. But I actually want that to be constrained. What I’m going to do is hit R for a rectangle, I’ll drop that in and then you can hit D, and it draws a dimension line. So I put that on the line, and then hit 2 to make that 2 inches. So this is a 2 inch by 2 inch part. Now in fact lets make it three inches by three inches just a little bit bigger. Alright, then hit finish sketch.
Alright, so I’ve got a simple rectangular object, now I’m going to go to the sheet metal tab, and right here there’s a create flange button. So I’ll click that, select the geometry, and then choose the sheet metal rule. Now I’ve pre-filled some of these, when you create a sheet metal rule in Fusion 360, you specify the sheet thickness, bend relief settings, and k factor and other bend deduction properties. For us, we don’t need to set that, we only care about the sheet thickness and then OSH Cut will handle the rest in terms of setting the bend radius correctly. And I’ll show you that in a second. Alright, so we’re gonna pick quarter inch steel just to make it interesting. We’ll go up to the top left here again and click flange, and I’m going to pull this up and make another 3 inch flange. Alright, so there’s the basic part. I’m going to put a couple holes in it, just to make it interesting. So I’ll click create a sketch, select the face again. I’ll do, let’s say, a half inch hole centered. Do D again for dimension and I’ll put it exactly a half inch away from that edge. And then, to make sure this is perfectly centered on this surface I’m going to go and hit L for line, or you can select it up here, and then if you hold as you go across this, notice that right here, there’s a triangle that appears. And what that means is I’m bisecting the line that it’s on, meaning I’m splitting it in 2, so I’ll drag that and then I will pull this line straight down and I’ll select that and hit X. And that basically confirms that, yes this is going to be right on that line. So I’ll go there and make sure it intersects.
So there’s my hole. I’ll hit E, that means extrude. I can select that feature, and drag it through like that and now I’ve got a hole in the flange. And I could do the small thing on the bottom. In the interest of time I will just go through that really fast here. Put another hole, it’s going to be half an inch. It’s going to be half inch from the edge. 0.5 inches, I’m going to make sure it’s centered properly. I’ll extrude it.
Alright, just a simple bracket. In practice, you know, this might need to look a little different to use it for any specific purpose but that’s good enough. So we’ll call this just a quarter inch steel bracket. Now I’ll right click at the top here and hit export. Make sure that step is selected. The default will be fusion files but you’ll want step, and then you hit export.
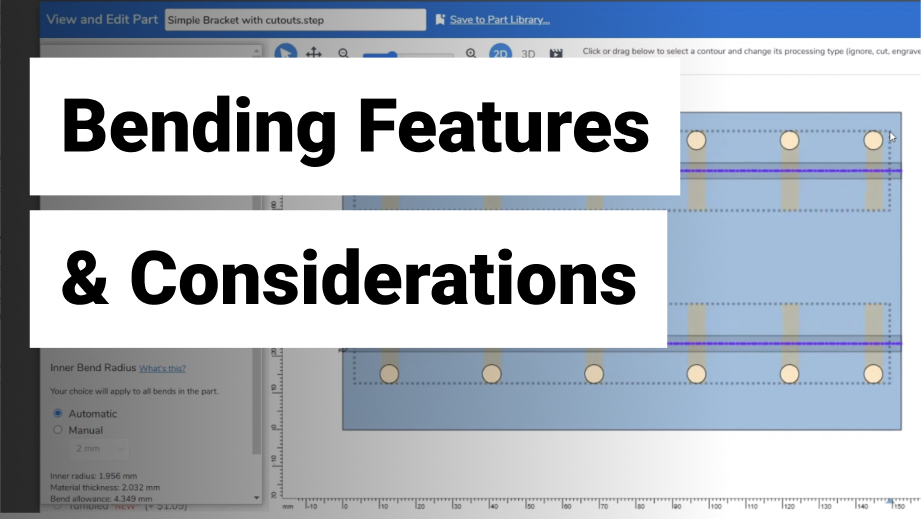
Alright so now we have the file. So I’ll upload the file, quarter inch steel bracket. This is just oshcut.com, click the instant quote link. Now I’ll select the material, and it passed the design rule check. And then what's cool about this is I can click into this, here’s the flat pattern. The flat pattern is what we have to cut out of sheet metal before we fold it on the press brake. And we do that automatically, and adjust the bend radius if we need to. And then there's the part, and here’s that part being made on OSH Cut’s tools. Now if we wanted more holes in this bracket, we could put them all the way up to about where this part makes contact with the die. If you do any closer you can cause deformation issues. So this gives us an idea how much more space we have to work with. To make that part.
Alright, and then from here, $32 for a single one of these parts Of course there are pretty volume discounts. Adding 10 drops the price by half and it drops from there. And then you’ll just hit proceed to check out to order that part with lead times as fast as same day. Let’s see, what’s the options here. So standard is 3 days for this bent part but you can get it in 1 day, looks like currently with the demand on the system.